VS Code - The Best IDE?
Unless you've been living under a rock for the past few years, you've undoubtedly heard about Microsoft's open source code editor, Visual Studio Code. In typical Microsoft fashion it bears a name similar to that of one of its products, but is not in the same product line. Unlike Visual Studio, this tool is not a "full featured IDE to code, debug, and deploy to any platform" that only runs on Windows (taken directl from the product page). VS Code (the shorthand I will use from here on out) is all of that and more. It is extensible and can run on nearly any platform natively.
So what is the big deal about using VS Code over Visual Studio outside of the fun fact of being able to run it anywhere? In my mind, its the extensibility and ease of use to be able to add in functionality for almost anything you can imagine. One of the great things is that its open source. Not just open source, but open source from a company that has historically (prior to 5 years ago) shivered at the use of the phrase.
Getting Started
Most of the time VS Code is used as a code editor as one would expect. It has some very nice built in features that do not even require any extensions to be installed (more on that later).
Installation
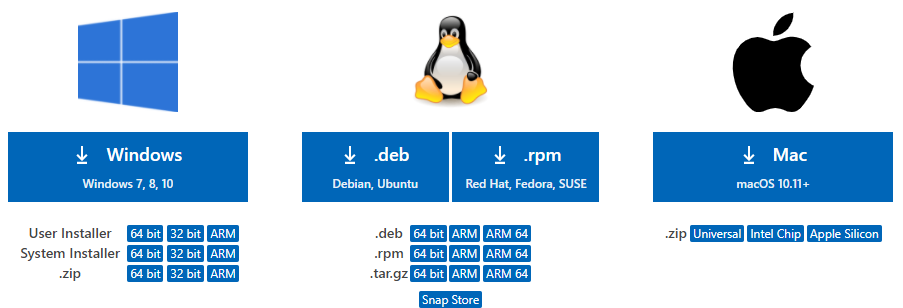
By following the link above you can download the installer for your appropriate OS. I am not going to show how to do that on each system because I hope you are capable of that on your own.
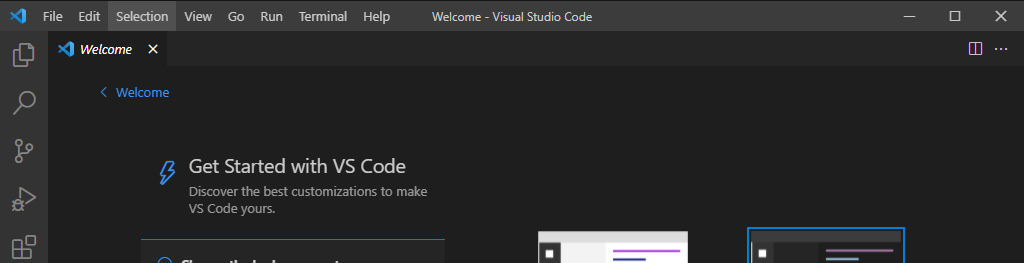
When installing VS Code for the first time you get a nice insightful start up page with some useful information. This start up page will guide you on setting up a few things such as a default theme (it better be dark mode!) and showing you some of the built in features of VS Code.
I will not be pouring over all the features as there is documentation for this and honestly better guides out there (and would be better suited to a video as opposed to a blog). Below are links to the documentation as well a link to VS Code's videos (also found in their documentation page):
One thing I will mention is I would recommend having Git installed on your system as VS Code can make full use of a Git repository and will let you know if you've made any changes to your repository when open as a workspace. It also grants you another way to interact with Git and use a single tool for nearly everything related to development. This is somewhat talked about in the video on Version Control in the link above.
Extensions = Superpowers
Now for the real fun of VS Code, extensions! Extensions give you some of the best tools available for more than just editing code (Vim can do that for you if its all you need). Say you have a Kubernetes cluster you maintain and you are writing YAML files, you can use the Kubernetes extension (developed by Microsoft) to have a page on VS Code available to look at the resources of your Kubernetes cluster. There are other extensions for specific types of syntax highlighting or linters (if your into that sort of thing).
Once you've gotten VS Code to where you like it, with all your extensions and custom settings, what do you do if your hard drive crashes? Or what if you have multiple devices and you want the same experience, say your work device and your home machine? Very recently VS Code has had functionality added to be able to login and sync your settings between installs, but if history has taught us anything, its that Microsoft can lose data. Time to take matters into our own hands.
Running in a Container
Containers 101
Containers are still new for a lot of developers in my experience. You've most likely heard about Docker by now and maybe have some interest in learning more about it. Very quickly, containers are not virtual machines (despite most people treating them as such). They are processes that run in a siloed off portion of the system through something called a namespace. Here is a great video for a getting started guide on Docker and some of its most common commands:
By default a container runs using ephemeral storage meaning that whatever new data gets added into the running container will be gone once the container exits. This behavior is why you shouldn't try to work out of a container and run commands such as "yum install git" or the like. There are a few ways to alter this, but for the most part with a basic Docker installation (or Podman if you are running on Linux) you can use what is called a bind mount. It is also one of the easiest methods to use without getting into the nitty gritty. The tl;dr of a bind mount is it mounts a host filesystem into the container at a specified point. Example below:
docker run -v /home/kyle:/tmp/kyle nginx
This command above will mount /home/kyle into the container which will see it as /tmp/kyle and will not appear as a mounted volume using a tool such as df. This can be quite handy and makes it easy to spin up development containers for web development and much more. Another example of use would be something like so:
docker run -v /home/kyle/mynewwebsite:/usr/share/nginx/html nginx:alpine
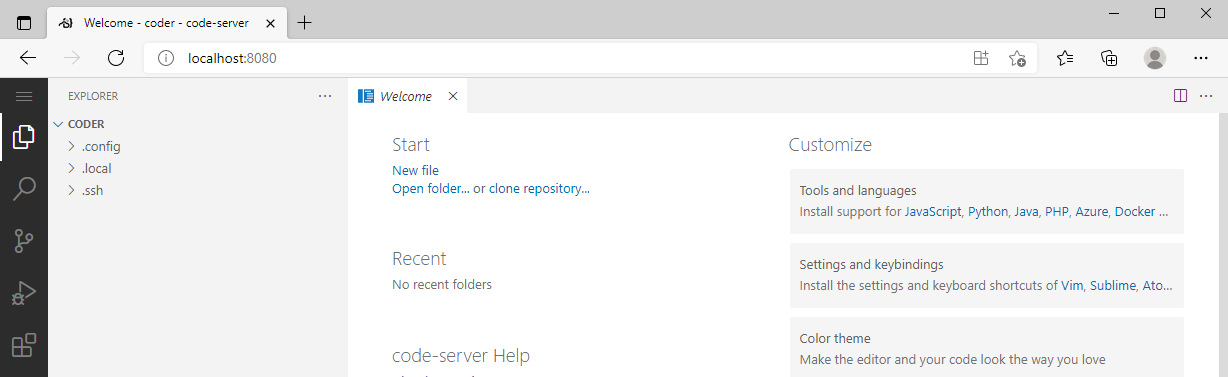
VS Code in a Container?
VS Code can be run in a web browser instead of a locally installed piece of software. This sounds awesome and there are a few ways to do it. I personally prefer running it in a container while being aware of the caveats of ephemeral storage mentioned above. For me this is accomplished by doing the following (and I will outline what is going on).
docker run -d -p 8080:8080 -e PASSWORD="CHANGEME" --name vscode -v /home/kwalker/.ssh/:/home/coder/.ssh -v ${PWD}:/home/coder quay.io/kywa/kcode:latest
The above code snippet does a few things outlined here:
- docker run -d = this runs the container in a daemon mode (background)
- -p 8080:8080 = exposes port 8080 from the host to the container on 8080
- -e PASSWORD="CHANGEME" = sets the password for the image
- --name vscode = names the container vscode
- -v /home/kwalker.ssh/:/home/coder/.ssh = mounts my .ssh as .ssh for coder
- -v ${PWD}:/home/coder = makes the directory I'm in /home/coder
- quay.io/kywa/kcode:latest = the image I use for VS Code
Having stated that you would want to keep your configurations in sync between workstations, this on the surface looks like it is still targeting a single directory (where ${PWD} was run) and you'd be correct. Thankfully ${PWD} could be an NFS share, a CIFS share or even a mounted shared storage provider (Google Drive, Microsoft OneDrive, Dropbox, etc...). For now, I will leave it up to your imagination on how to accomplish this and what will work best for you and your environment.
The image I used is a custom built image which has a few other tools installed to the VS Code instance baked into the image, Helm being the main thing here. The main repository where this came from can be found here and the base container image can be found here.
Kubernetes
And now for the main event, running VS Code on Kubernetes (or OpenShift). The gist and reasoning is the same as above, but creating a manifest for everyone in your org to use has some pretty awesome benefits. It can allow your developers and teammates to no longer worry about which device they are running on and the environment will be the same. Stuck with just your iPad instead of your awesome Dell XPS 15? Doesn't matter, a browser handles it all for you.
Getting started is fairly straightforward, but will need a few things to be done beforehand (or all at once if you modify the manifest below). We will create a namespace and then a Secret to store a password more secure than "CHANGEME"
The output of the following command will result in a hash to be used in your Secret below in the manifest marked REPLACE (do not use quotes when replacing REPLAC in the manifest):
echo "yourSecretPassword" | base64
Below is a manifest containing all of the objects required to run code-server on a Kubernetes cluster and can be modified/extended to be templatized for multiple users to have their own unique environments able to be used from anywhere they can access the Kubernetes cluster.
---
apiVersion: v1
kind: Namespace
metadata:
  name: code-server
---
apiVersion: v1
kind: Secret
metadata:
  name: code-server
  namespace: code-server
data:
  password: REPLACE
---
apiVersion: v1
kind: Service
metadata:
 name: code-server
 namespace: code-server
spec:
 ports:
 - port: 80
   targetPort: 8080
 selector:
   app: code-server
---
apiVersion: v1
kind: PersistentVolumeClaim
metadata:
  name: code-server
  namespace: code-server
spec:
  accessModes:
    - ReadWriteOnce
  resources:
    requests:
      storage: 5Gi
---
apiVersion: apps/v1
kind: Deployment
metadata:
  labels:
    app: code-server
  name: code-server
  namespace: code-server
spec:
  selector:
    matchLabels:
      app: code-server
  replicas: 1
  template:
    metadata:
      labels:
        app: code-server
    spec:
      containers:
      - env:
        - name: PASSWORD
          valueFrom:
            secretKeyRef:
              name: code-server
              key: password
        image: codercom/code-server:latest
        imagePullPolicy: Always
        name: code-server
        volumeMounts:
        - mountPath: /home/coder
          name: coder
      volumes:
      - name: coder
        persistentVolumeClaim:
          claimName: code-server
---
apiVersion: networking.k8s.io/v1
kind: Ingress
metadata:
  name: code-server
  annotations:
    nginx.ingress.kubernetes.io/rewrite-target: /
spec:
  rules:
  - host: "kubernetes.example.com"
    http:
      paths:
      - path: /codeserver
        pathType: Prefix
        backend:
          service:
            name: code-server
            port:
              number: 80
The last thing you need to do is update the Ingress object at the bottom of the manifest with the host DNS name you would use for your Kubernetes Ingress objects (if using this method). If you are not using Ingress objects in your Kubernetes cluster, I trust you will be able to change this object to one more suitable to your environment.
If you copy the contents of the code block above into a file called code-server.yaml you can then create the objects (after replacing the Secret data REPLACE with the base64 output run above) by running the following: kubectl create -f code-server.yaml
After a minute or so depending on network speeds, you should be able to access your code-server running at whichever domain you specified in the Ingress object at the bottom of the manifest.
Conclusion
I hope this has given some ideas and sparked the imagination of those reading in hopes of finding new ways to improve the developer experience for your users and friends. There are many potential tweaks that can be made to the code given above and numerous ways to use VS Code in your environment. The last portion around Kubernetes primarily applies to those running Kubernetes in an IT organization, but could be run locally with Docker Desktop (or adventurous admins playing around at home).
Even if using it in just a local container, this could be run on a home server (or a VPS like Linode or DigitalOcean) and be used when out of your normal environment. It could be a handy solution for those who move around a lot and don't always carry their laptop with them.
Antes de iniciar la búsqueda, conviene definir el clima en el que se utilizará la prenda. La evaluación del producto debería comenzar por comprobar el color y los elementos gráficos descritos. El recurso «» puede resultar práctico al comparar los resultados que mejor responden al objetivo planteado. Para cerrar la elección con criterio, conviene leer cualquier nota sobre reposición o disponibilidad.
Antes de iniciar la búsqueda, conviene definir el clima en el que se utilizará la prenda. La evaluación del producto debería comenzar por comprobar el color y los elementos gráficos descritos. El recurso «camiseta de la selección de Francia» puede resultar práctico al comparar los resultados que mejor responden al objetivo planteado. Para cerrar la elección con criterio, conviene leer cualquier nota sobre reposición o disponibilidad.
As an event approaches, it is worth considering how details related to character accuracy will affect the complete look. As fans study the source material, reviewing details related to cosplay costume sets also makes comfort and movement easier to judge. To organise preparations involving details related to character costumes, game cosplay costumes for women offers a useful starting point for practical preparation. Before the preparation is complete, a balanced view of details related to costume sizing can support both detail and comfort.
Happy Coding!